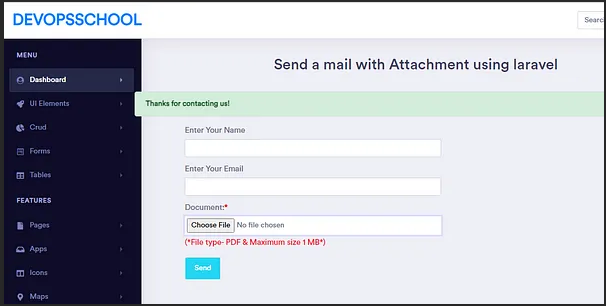
In this tutorial im going to demonstrate how to upload document and send data via Email. Please follow some easy steps mentioned below.
First let’s go to install laravel project
composer create-project laravel/laravel learning-projectlets go to .env folder and put database name and connect to database.
DB_CONNECTION=mysql
DB_HOST=127.0.0.1
DB_PORT=3306
DB_DATABASE=learning-project
DB_USERNAME=root
DB_PASSWORD=
Let’s to create Controller
php artisan make:controller SendEmailController

Go to your controller SendEmailController and paste below code
<?php

namespace App\Http\Controllers;

use Illuminate\Http\Request;
use Illuminate\Support\Facades\Mail;
use App\Mail\SendMail;
use App\UploadImage;

class SendEmailController extends Controller
{

    function index()
    {
     return view('send_email');
    }
    public function store(Request $request){
        $request->validate([
        'name'=>'required',
        'email' => 'required',
        'image'=> 'required',
        ]);

        $resume = time() . '.' . $request['image']->getClientOriginalExtension();
        $imagesendbymailwithstore= new UploadImage();
        $imagesendbymailwithstore->name =  $request->name;
        $imagesendbymailwithstore->email = $request->email;
        $imagesendbymailwithstore->image = $resume;
        $imagesendbymailwithstore->save();

        // for mailling function working
        $imagesendbymailwithstore = array(
            'name' => $request->name,
            'email' => $request->email,
            'image' => 	$request->image,

        );
        Mail::to($imagesendbymailwithstore['email'])->send(new SendMail($imagesendbymailwithstore));
        $request['image']->move(base_path() . '/storage/app/public', $resume);
        return back()->with('success', 'Thanks for contacting us!');
    }
}
Next create model and migration file so run below code.
php artisan make:model UploadImage -m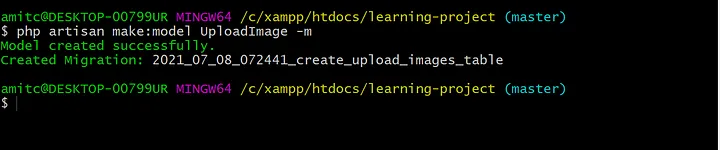
Next step go to your migration and and table
database\migrations\2020_10_23_070450_create_upload_images_table.php
Add follow column name
$table->string('name');
$table->string('email');
$table->string('image');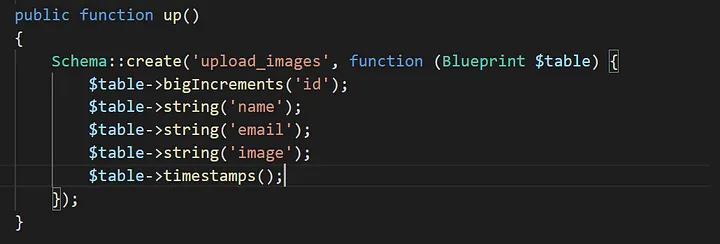
Now migrate the table
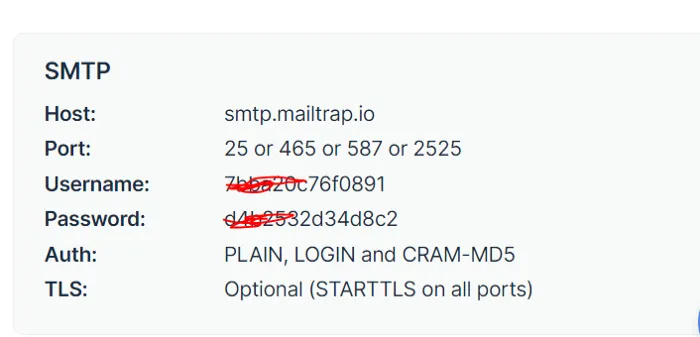
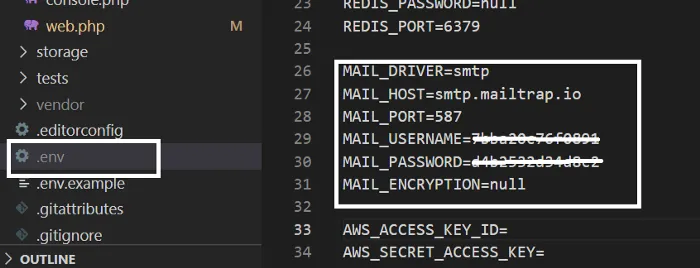
php artisan migrateCreate a Mailable class first you have to create an account in mailtrap or click this url https://mailtrap.io/ after create account you have to copy Username: XXXXXXXXX and password: XXXXXXXXXX and put in .env file see pic
Now we are ready for make mailable class for this we have to go teminal and write following
Then make a view page send_email.blade.php
<!DOCTYPE html>
<html>
 <head>
  <title>  send a mail with Attachment </title>
  <script src="https://ajax.googleapis.com/ajax/libs/jquery/3.1.0/jquery.min.js"></script>
  <link rel="stylesheet" href="https://maxcdn.bootstrapcdn.com/bootstrap/3.3.6/css/bootstrap.min.css" />
  <script src="https://maxcdn.bootstrapcdn.com/bootstrap/3.3.7/js/bootstrap.min.js"></script>
  <style type="text/css">
   .box{
    width:600px;
    margin:0 auto;
    border:1px solid #ccc;
   }
   .has-error
   {
    border-color:#cc0000;
    background-color:#ffff99;
   }
  </style>
 </head>
 <body>
  <br />
  <br />
  <br />
  <div class="container box">
   <h3 align="center">send a mail with Attachment using laravel 5.8</h3><br />
   @if (count($errors) > 0)
    <div class="alert alert-danger">
     <button type="button" class="close" data-dismiss="alert">×</button>
     <ul>
      @foreach ($errors->all() as $error)
       <li>{{ $error }}</li>
      @endforeach
     </ul>
    </div>
   @endif
   @if ($message = Session::get('success'))
   <div class="alert alert-success alert-block">
    <button type="button" class="close" data-dismiss="alert">×</button>
           <strong>{{ $message }}</strong>
   </div>
   @endif

<form method="post" action="{{ route('sendemail.store') }}" enctype="multipart/form-data" role="form" class="form-horizontal" id="location">
    {{ csrf_field() }}
    <div class="form-group">
     <label>Enter Your Name</label>
     <input type="text" name="name" class="form-control" value="" />
    </div>
    <div class="form-group">
     <label>Enter Your Email</label>
     <input type="text" name="email" class="form-control" value="" />
    </div>

    <div class="form-group">
            <label for="resume" placeholder="(resume type *PDF*)">Document:<span class="text-danger font-weight-bold">*</span></label>
            <input type="file" class="w-100 p-1" name="image" value="{{old('resume')}}"/>
            <label class="text-danger mt-1" >(*File type- PDF & Maximum size 1 MB*)</label>
    </div>
    <div class="form-group">
     <input type="submit" name="send" class="btn btn-info" value="Send" />
    </div>
   </form>

  </div>
 </body>
</html>
Next step make one blade page resources/view/dynamic_email_template.blade.php
<p style="margin-left:10%;">First Name - <b>{{ $data['name'] }} </b></p>
<p style="margin-left:10%;">last Name - <b>{{ $data['email'] }}  </b></p>


<p>It would be appriciative, if you gone through this feedback.</p>
Next one to create SendMail.php file run below code.
php artisan make:mail SendMail
Next step go to App\Mail\SendMail.php and paste below code
<?php

namespace App\Mail;

use Illuminate\Bus\Queueable;
use Illuminate\Mail\Mailable;
use Illuminate\Queue\SerializesModels;
use Illuminate\Contracts\Queue\ShouldQueue;

class SendMail extends Mailable
{
    use Queueable, SerializesModels;
    public $imagesendbymailwithstore;
    /**
     * Create a new message instance.
     *
     * @return void
     */
    public function __construct($imagesendbymailwithstore)
    {
        $this->imagesendbymailwithstore = $imagesendbymailwithstore;
    }

    /**
     * Build the message.
     *
     * @return $this
     */
    public function build()
    {
        return $this->from('info@scmgalaxy.com')
        ->subject('New image from Devops Team')
        ->view('dynamic_email_template')
        ->with('data', $this->imagesendbymailwithstore)
        ->attach($this->imagesendbymailwithstore['image']->getRealPath(),
            [
                    'as' => $this->imagesendbymailwithstore['image']->getClientOriginalName(),
                'mime' => $this->imagesendbymailwithstore['image']->getClientMimeType(),
            ]);

    }
}
Next define routes go to your routes/web.php file and paste below code.
Route::get('sendemail','SendEmailController@index');Route::post('sendemail.store','SendEmailController@store')->name('sendemail.store');Now run below code and refresh your browser and fill form
php artisan serve
http://127.0.0.1:8000